How to Winterize Your Swamp Cooler in Denver Before the First Freeze
Denver's median first freeze lands between October 7 and 15. Here's the exact procedure, what it costs to hire out, and what to do if last winter already got you.

Denver’s median first freeze lands between October 7 and 15. Here’s the exact procedure, what it costs to hire out, and what to do if last winter already got you.
If you own a swamp cooler in Denver, the third week of September is the only window that matters. Not October. Not “before it gets cold.” The third week of September. By the time you feel the chill and finally think about it, you’re already pressing your luck.
One concrete premise runs through everything here: a 35-minute procedure done before September 25 prevents a repair bill that routinely hits $1,500 and can reach $8,000 when water gets into the wrong places. The dates, companies, cost figures, and permit rules below are Denver-specific. The generic HVAC guides circulating online don’t know what October looks like at 5,280 feet.
When Denver’s First Freeze Actually Arrives
The National Weather Service office in Boulder tracks historical freeze data for Denver International Airport, and the 30-year normals are unambiguous: Denver’s median first freeze arrives between October 7 and 15. That’s the middle of the distribution. One year in ten, the first sub-32°F night comes before October 1. The earliest freeze years on record at DIA arrived in late September.
September 25 is your planning date. Not because the freeze arrives that day, but because it gives you a two-week buffer against the median arrival and a real hedge against early years. If you handle projects on weekends, September 25 means the weekend of September 20-21, or September 13-14 if you want to stop thinking about it.
A misconception circulates in Capitol Hill, Washington Park, and other dense urban neighborhoods: that Denver’s urban heat island meaningfully delays the freeze deadline. Capitol Hill and Wash Park typically run 2 to 4°F warmer than DIA on calm nights, from retained heat in pavement and buildings. But the threshold that matters is 28°F — where water in a swamp cooler’s reservoir pan and distribution lines freezes hard enough to crack plastic fittings and pan seams. A 4°F urban heat island advantage pushes that arrival back by a few days. Not weeks. Not into November. Your catastrophic-freeze night might arrive October 11 instead of October 7. Plan accordingly.
Residents with rental properties or second homes in Evergreen, Morrison, or the foothills should move their personal deadline two to three weeks earlier than the metro baseline. Those properties see hard freezes well ahead of DIA’s median. Pueblo averages its first freeze around October 15 to 20, roughly one to two weeks later than Denver. Fort Collins tracks closely with Denver, often within a few days. Use DIA data, not regional generalizations.
Why Denver’s September Swings Make Waiting Dangerous
Denver’s September and early October weather has a specific character that catches residents off guard every year: the diurnal swing. The gap between the daily high and overnight low regularly runs 30 to 40°F. A genuinely pleasant 72°F Tuesday afternoon can give way to a 29°F Wednesday predawn without anything in the forecast that reads as alarming. If you’ve lived here more than two years, this sounds familiar.
At 5,280 feet, Denver’s thinner atmosphere holds less heat after sundown. The city radiates the day’s warmth upward quickly on calm, clear nights — exactly the nights that dominate September. The afternoon temperature is a poor guide to the overnight low.
Residents who check the weather app at 3 p.m. and see a high of 70°F are not looking at the number that matters. The 5 a.m. low is the number that matters. In September that low can arrive at or below 32°F with a forecast that showed nothing more threatening than “cool overnight.” This is the mechanism behind early, expensive freeze damage. The freeze doesn’t announce itself. It happens on an unremarkable Tuesday night in late September while the cooler sits on the roof full of standing water, waiting for a service appointment pushed to “next weekend.”
What Physically Happens When You Wait Too Long
Water expands about nine percent when it freezes. In a closed system — a plastic reservoir pan, a rubber supply line, a thin-walled distribution tube — that expansion has nowhere to go. The container fractures.
For a swamp cooler, failure typically begins in the reservoir pan, which holds several gallons when a unit is shut off but not drained. That water freezes. The pan cracks along a seam or at a corner. The next warm day turns the ice back to water, which now flows directly into the ceiling assembly below. Denver HVAC technicians describe this as the repair scenario they dread in spring. Once water reaches roofing materials and the ceiling — insulation, drywall, sometimes framing — the scope expands fast.
A pan crack that might have cost $200 to $400 as an isolated repair becomes a $1,500 to $8,000 project once mold has established in wet insulation, drywall needs replacement, or framing has begun to deteriorate. How long the water has been present matters enormously. So does whether the homeowner noticed damage before running the cooler again in spring — because running it drives more water through a compromised pan and accelerates everything.
Pump failure is a related outcome. When standing water in the pump housing goes through multiple freeze-thaw cycles, pump seals and impellers degrade. A pump that ran fine in September may refuse to circulate water the following June, adding a pump replacement to the spring bill.
That’s the cost-of-doing-nothing number. Not the $100 for a pro winterization visit. $1,500 to $8,000 in ceiling and framing repair, plus however much patience you have for a spring spent coordinating roofing contractors, drywall crews, and mold remediation. I’d rather spend 35 minutes on a Saturday in September.
How to Winterize Your Swamp Cooler in Under 35 Minutes
The procedure isn’t complicated. It requires doing the steps in the right order and not skipping step three. That’s the step most DIY attempts omit.
Plan for 20 to 35 minutes if you’ve done this before. First-timers: add 15 minutes. You’ll need access to the unit (typically rooftop), a flathead screwdriver or small wrench for the drain plug, replacement water panels if yours are fouled, and a properly sized cover.
Step 1: Shut the dedicated water supply valve. Every swamp cooler should have a dedicated shutoff on the supply line — typically in the attic, crawlspace, or mechanical closet below. Close this first. This stops water from entering the system while you work and ensures no new water refills the reservoir as you drain it.
Step 2: Run the pump briefly to clear distribution lines. With the supply valve closed, turn the cooler’s pump on for 30 seconds or so. This pulls remaining water from the distribution lines down into the reservoir pan rather than leaving it sitting in elevated tubing where it will freeze first. Turn the pump off.
Step 3: Drain the reservoir pan completely. This is the step roughly half of DIY attempts skip, and it’s the most important one. No exceptions. The reservoir pan holds several gallons even after the pump runs. Locate the drain plug at the pan’s bottom — rubber or plastic, sometimes a small threaded fitting — and remove it over a bucket, or let the water drain away from the structure. Confirm the pan is empty before reinstalling the plug. Don’t leave the drain plug out over winter; debris will accumulate and potentially clog the drain line.
Step 4: Disconnect and drain the water supply line. The copper or plastic supply line running from the shutoff valve to the cooler should be disconnected at the cooler end and drained completely. Depending on how the line is routed, you may be able to let it hang loose at the cooler to drain by gravity, or blow it out with a compressor. The goal is no standing water in the line on the roof side of the valve.
Step 5: Remove the cooling pads and inspect them. Pull the water panels out of the cooler frame. In Denver, pads develop significant mineral buildup by end of season from a full summer of evaporation — hold one up to the light. Heavy white or gray crust that won’t rinse off means replace them, not store them. Storing fouled pads invites mold and reduces airflow efficiency next season. Replacement aspen or synthetic pads run $12 to $30 depending on size, available at Home Depot on South Colorado Boulevard or Lowe’s locations in Lakewood or Aurora.
Step 6: Close the interior duct damper. Every swamp cooler connects to the home’s duct system through a damper — a metal flap that seals the duct when the cooler isn’t in use. Without closing it, your furnace heats conditioned air that escapes through the open cooler all winter. Find the damper lever inside the cooler cabinet or at the duct connection point in the ceiling and close it fully. About half of homeowners miss this step, then spend all winter wondering why the heating bill climbed. If you can’t locate the damper or it doesn’t seem to seal, add it to the conversation if you’re scheduling a pro visit anyway.
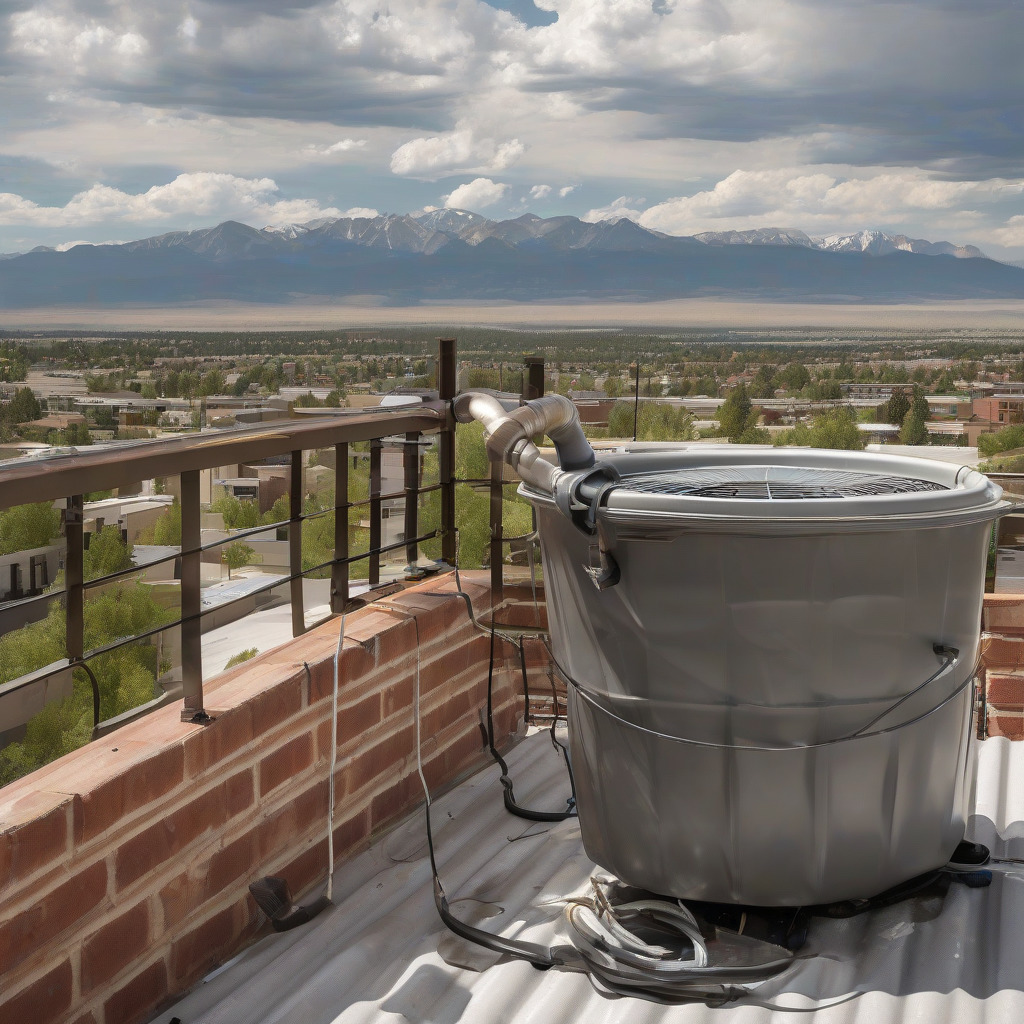
Step 7: Cover the exterior unit. A purpose-built evaporative cooler cover, sized for your unit’s specific dimensions, keeps winter debris, moisture, and animals out of the housing. Don’t use a tarp. Tarps collect moisture against the unit and accelerate corrosion. Purpose-built covers run $20 to $45 at Home Depot on South Colorado Boulevard. Denver’s chinook wind events regularly produce gusts of 50 to 60 mph on the Front Range, so anchor the cover with the built-in straps or bungee cords through the louvered panels. A cover that blows off in November leaves the unit exposed for the rest of winter.
Optional: If you have a compressor, blow out the distribution lines and spider tubing after draining. Two minutes, extra insurance on lines that didn’t fully drain in step two.
One safety note worth stating directly: if your cooler sits on a steep or high rooftop without safe ladder access, skip the DIY. That’s not a savings opportunity — it’s a fall risk. Similarly, if you see visibly corroded fittings, significant rust on the frame, or the unit hasn’t been serviced in three or more years, have a professional assess it before disconnecting components that may be near failure.
DIY vs. Hiring a Pro: What It Actually Costs in Denver Right Now
The DIY material cost for a complete winterization runs under $50 in almost every case: a cover ($20 to $45), replacement water panels if needed ($12 to $30 each), and maybe a supply line fitting under $15. If the unit is in good shape and you’ve done this before, you’re out $35 to $45 and 35 minutes.
Professional winterization in Denver typically runs $65 to $150 for a standard residential unit. Rooftop-access units usually carry a surcharge above the base rate. Several established companies do this work: Bell Plumbing and Heating serves central Denver; Applewood Plumbing, Heating and Electric operates metro-wide; Brothers Plumbing, Heating and Electric is based in Wheat Ridge and covers the northwest suburbs; Blue Sky Plumbing & Heating operates out of Aurora. Call for current pricing before booking — scheduling windows narrow fast as October approaches.
The professional option makes obvious sense if you don’t have time this month, your unit is overdue for inspection anyway, your rooftop access is marginal, or you want a technician to confirm the unit’s condition before sealing it up for winter. Those are all reasonable. What isn’t reasonable is skipping it entirely because you can’t decide between the two. A professional visit is a fixed, known cost. A skipped winterization is an open-ended expense that starts at $1,500 once structural damage is involved.
If Last Winter Already Got You
Some readers opening this aren’t trying to prevent damage. They already found it. Water staining on a ceiling below the cooler when the house reopened after winter. The cooler ran intermittently last spring before shutting off. Or they simply never winterized and want to understand what they’re dealing with before October arrives again.
Before anything else: shut off the water supply to the cooler now. Do not run the unit to test it before you know whether the reservoir pan is intact. Running the pump with a cracked pan dumps water directly into your ceiling.
From the roof, examine the decking and flashing around the cooler base. Press on the roof decking — soft spots indicate water intrusion. Look for water staining on the tar paper or decking material, and rust streaking on the exterior of the unit. Inside, check the ceiling directly below the cooler for staining, soft drywall, or any musty smell. For a broader look at what professionals find when they get up close, what Denver home inspectors flag most often includes moisture issues that follow exactly this pattern.
Here’s the rough cost hierarchy, from best to worst case:
Cracked reservoir pan replacement runs $200 to $500, parts and labor, if the damage is contained to the pan with no water below. This is the outcome you’re hoping for.
Distribution line replacement — the tubing and spider assembly — runs $75 to $200. Relatively cheap hardware, though corroded fittings add professional time.
Full unit replacement runs $600 to $1,800 installed, depending on cooler size and roof access. If the unit is old and the pan is cracked, replacement often makes more financial sense than repairing a deteriorating cooler.
Roof and ceiling repair from water intrusion starts at $500 and has no real ceiling. Duration of the water exposure, extent of mold growth, and whether framing is involved all drive the number. This is where the cost becomes genuinely open-ended — and why catching damage before running the cooler in spring matters so much.
Not every HVAC company in Denver does evaporative cooler work. It’s a specialty niche, and refrigerated HVAC technicians often don’t stock the parts or have the familiarity to diagnose these failures efficiently. When calling around for repair estimates, specifically ask whether the company services evaporative coolers and whether they stock replacement pans for your unit’s brand and size. Bell Plumbing and Heating, Applewood Plumbing Heating and Electric, Brothers Plumbing and Heating in Wheat Ridge, and Blue Sky Plumbing & Heating in Aurora all specifically service evaporative coolers.
If you’re reading this in September and already know you have damage from last winter, scheduling the repair now gives you better availability than waiting until spring. Post-freeze repair volume in April and May means the companies doing this work are running with significant backlogs. You don’t want to be calling around in May competing with every other homeowner who discovered the same problem when they turned their cooler on.
Permits, Code, and Insurance
Routine seasonal winterization — shutting the water supply, draining the reservoir, removing pads, covering the unit — is maintenance. No permit required from Denver Community Planning and Development. Same category as cleaning gutters.
Full unit replacement or installation of a new water line is different. Those may require a permit and a licensed plumber for the water connection. Confirm with CPD directly at 720-865-2705 or denvergov.org/permits before starting any replacement work.
On insurance: standard Colorado homeowner’s policies cover water damage from unexpected events. A cracked swamp cooler pan resulting from a unit that sat through a Denver winter unwinterized is not unexpected — it’s foreseeable, and adjusters know it. That $1,500 to $8,000 ceiling repair scenario described earlier is most likely an out-of-pocket expense, not a claim. Confirm with your specific agent, because policy terms and endorsements vary. The Colorado Division of Insurance is the state resource for coverage disputes, and it also publishes guides on what standard homeowner’s policies do and don’t cover in our home & property coverage that residents can use as a baseline.
The Short Version
Winterize before September 25. Drain the reservoir pan — that’s the step half of people skip, and it’s the one that matters most. Close the interior damper or your heating bill will tell on you all winter. Cover the unit with something that actually fits and won’t blow off in a chinook. The whole job takes 35 minutes and costs under $50 in materials.
If you’d rather write a check, call Bell Plumbing and Heating, Applewood Plumbing Heating and Electric, Brothers Plumbing and Heating in Wheat Ridge, or Blue Sky Plumbing & Heating in Aurora. Fixed cost, known outcome.
If last winter already got you, turn off the water supply before touching anything and find a company that specifically services evaporative coolers. Not all of them do.
Denver’s first freeze arrives in the first two weeks of October. It doesn’t wait for a convenient weekend.